martinbmwmkiller Skrevet Januar 23, 2012 Forfatter Skrevet Januar 23, 2012 Fikk tilpassa m3 radiator dekselet ble nice
martinbmwmkiller Skrevet Januar 23, 2012 Forfatter Skrevet Januar 23, 2012 her er noe mer om obc kobling You may think that the OBC conversion thing has been done to death, however most guides cover the 11 to 18 button conversion and as I found out there are some extras you need to know if you want to work up from a 7 button. Before I go on I should say that my Touring doesn't have check control and I didn't want to bother wiring it in so this article doesn’t cover that part of the conversion. Before I started I went to the breakers and cut the whole wiring loom behind the dash out of the scrap car. It took ages but this made things a lot easier when trying to use the right colour wires with the right connectors so I recommend you do the same. Using the Pelican OBC article as my main guide I wired up the new white OBC plug (X1071) and got ready to use all those wonderful new features – but I soon found out that whilst the Range was working, Consumption & Average Speed were not! As the Range was registering this told me I had data from the fuel tank. The other part of the MPG equation is the miles travelled. I unlocked the OBC to get to the “secret codes” and went into Test No 8 which should show real-time speed in Km/h when driving. On my OBC this stayed as zero so I knew that there was no speed data. The Pelican guide suggests that the speed data comes from a white/grey wire going from pin 9 of the white OBC plug (X1071) to pin 10 of the blue dash plug (X17). I re-checked my wiring and did continuity test from pin to pin and all was well. I also have a 96 Convertible with a factory OBC (without check control) so I did lots of comparison test on the wires to the new white OBC plug (X1071). Everything matched but I also found out that the voltage to the white/grey wire went down depending on the throttle position when driving, regardless of road speed - that suggested it wasn’t the speed data connection. I checked & re-checked all my wiring to the white OBC plug (X1071) but after satisfying myself that everything was 100% correct I turned my attention to the black OBC plug (X1070) that is already fitted to the car. It already had wires from pins 12 to 18 but no others. Looking at the Pelican guide it seemed that pins 2, 3, 4, 5, 8, 10 & 11 were for the Check Control and chime so I didn’t worry about fitting them. That left pins 6 & 9. Pin 6 is a Blue/Brown/Yellow wire going to pin 26 of the blue dash plug (X17). This was missing from both the dash & the black OBC plug so I wired it up – Nothing! Pin 9 is a Green/Blue wire which according to the Pelican guide and both the pre 97 and 98 Bentley OBC wiring diagrams goes to fuse 23. I decided to check if this was wired to the dash in some way so I had a look the Bentley “1998 Instrument Panel” diagram. I then noticed that this wire is spliced into pin 4 of the blue dash plug (X17). Just like the other wire it was missing from both the dash & the black OBC plug so I wired it up – Success! The Consumption & Speed buttons work and Test No8 shows the actual speed in Km/h. That leads me to believe that this is the speed data. Finally, here is my wiring guide for a 7 to 18 button OBC conversion (without Check Control) using a 96 OBC in a 99 car. I hope it helps. X1070 – Black OBC Plug 1. Vacant 2. Vacant 3. Vacant 4. Vacant 5. Vacant 6. Blue/Brown/Yellow to pin 26 of the blue dash plug (X17) – Not present at either end so I had to fit it to both plugs. I don’t know what this does! 7. Vacant 8. Vacant 9. Green/Blue to pin 4 of the blue dash plug (X17) – Not present at either end so I had to fit it to both plugs. I now believe this carries the speed data. 10. Vacant 11. Vacant 12. Brown/Grey to Outside Temp Sensor – Already present 13. Black/White to pin 2 of the white dash plug (X16) – Already present 14. Violet/White to fuse F45 – Already present 15. Blue/Violet/White to pin 24 of blue dash plug (X17) – Already present 16. Grey/Red to Interior Lights – Already present 17. Brown to earth – Already present but moved to pin 13 on white OBC plug (X1071) 18. Red/Yellow to live – Already present but moved to pin 8 on white OBC plug (X1071) X1071 – White OBC Plug 1. Black/Green to pin 15 of the purple alarm plug (X1659) behind the glove box – Not present at either end so I had to fit it to both plugs. I think you only need to fit this if you want to use the “Code” feature to immobilise your car. 2. Vacant 3. Vacant 4. Brown/Red to indicator stalk – I didn’t have the “OBC cycle” stalk so I removed this wire. 5. White/Violet to pin 12 of the white dash plug (X16) – Already present at the dash plug so I spliced this. It carries the Body Computer Data 6. White/Black to pin 21 of the white dash plug (X16) – Already present at the dash plug so I spliced this. It carries the data from the fuel tank 7. White/Yellow to pin 11 of the white dash plug (X16) – Already present at the dash plug so I spliced this. It carries the Body Computer Data 8. Red/Yellow to live – Moved from pin 18 on black OBC plug (X1070) 9. White/Grey to pin 10 of the blue dash plug (X17) – Not present at either end so I had to fit it to both plugs. Judging from my tests this seems to carry throttle position data, not the speedo data. 10. Vacant 11. Vacant 12. Vacant 13. Brown to earth – Moved from pin 17 on black OBC plug (X1070) 14. Vacant 15. Vacant 16. Vacant 17. Vacant 18. Vacant
martinbmwmkiller Skrevet Januar 23, 2012 Forfatter Skrevet Januar 23, 2012 da skal man få prøve å koble opp fart, forbruk og hvor mye man har av km igjen av tanken, så får se hvordan det går da
martinbmwmkiller Skrevet Januar 24, 2012 Forfatter Skrevet Januar 24, 2012 da har man fått montert høyre bøttestol ble nice
babjorn Skrevet Januar 24, 2012 Skrevet Januar 24, 2012 Pene stoler,bare syn det ikke er vip type.Siden det skal være det for å ha det godkjent.
martinbmwmkiller Skrevet Januar 24, 2012 Forfatter Skrevet Januar 24, 2012 skal kjøpe vipp bar understell sånn at jeg kan få vippa de fremover
martinbmwmkiller Skrevet Januar 25, 2012 Forfatter Skrevet Januar 25, 2012 Jo takk ^^. Kjøpt på streetdesign.no
Papperboy Skrevet Januar 25, 2012 Skrevet Januar 25, 2012 Likte bilen din veldig godt... Gjør så man får lyst på e36 bruksbil igjen
martinbmwmkiller Skrevet Januar 25, 2012 Forfatter Skrevet Januar 25, 2012 jo takk så bra da det er myyye igjen. så følg meg
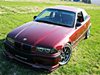
martinbmwmkiller Skrevet Januar 25, 2012 Forfatter Skrevet Januar 25, 2012 Tokk noen bilder i dag da hva syns dere ?
arsenal1992 Skrevet Januar 26, 2012 Skrevet Januar 26, 2012 nice bil du har... ka fargekodn/navnet på biln e ?
martinbmwmkiller Skrevet Januar 26, 2012 Forfatter Skrevet Januar 26, 2012 Lakken heter calypsrot rød trur jeg
Anbefalte innlegg
Opprett en konto eller logg inn for å kommentere
Du må være et medlem for å kunne skrive en kommentar
Opprett konto
Det er enkelt å melde seg inn for å starte en ny konto!
Start en kontoLogg inn
Har du allerede en konto? Logg inn her.
Logg inn nå