
Gå til innhold
View in the app

A better way to browse. Learn more.

Bimmers.no | BMW Forum

A full-screen app on your home screen with push notifications, badges and more.

To install this app on iOS and iPadOS
  1. Tap the Share icon in Safari
  2. Scroll the menu and tap Add to Home Screen.
  3. Tap Add in the top-right corner.
To install this app on Android
  1. Tap the 3-dot menu (⋮) in the top-right corner of the browser.
  2. Tap Add to Home screen or Install app.
  3. Confirm by tapping Install.
🔧 Vi fornyer Bimmers.no! Oppgraderinger gjennom november kan medføre periodevis ustabilitet. Takk for tålmodigheten!
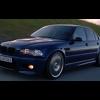
JEPPE: E46 M3 SMG sedan prosjekt

Featured Replies

Skrevet
  • Forfatter

Got a lot done the last two days. Started with removing the brake lines in the engine compartment.

CIMG1642.jpg

CIMG1644.jpg

Removed all the heat insulation.

CIMG1653.jpg

CIMG1665.jpg

Out goes the fuel tank.

CIMG1674.jpg

All the fuel and brake lines on a e46:

CIMG1690.jpg

Nothing left..

CIMG1688.jpg

Cleaning the boot.

CIMG1718.jpg

CIMG1734.jpg

  • Svar 226
  • Visninger 200.5k
  • Created
  • Siste svar

Top Posters In This Topic

Most Popular Posts

  • På tide med en oppdatering her. Fikk montert ESS VT2-500 kompressor kit i sommer. Kjørte det først som et 450 kit uten intercooler siden ESS manglet intercoolerrørene. Men fikk montert intercooler i h

  • Im waiting for some parts before I can complete the front. So I have been working on other parts of the car. Washing the rear suspension. And a lot of other parts... More parts.. Two lay

  • Was out driving and stopped to take some pics. Good times Been driving some the last days and I just love the car more and more. It's also fun to see peoples reactions, and all have been

Skrevet
  • Forfatter

Removed the interior:

CIMG1737.jpg

CIMG1746.jpg

Parts lined up..

CIMG1747.jpg

Removing the dash.

CIMG1763.jpg

CIMG1775.jpg

Parts filling up..

CIMG1810.jpg

CIMG1811.jpg

Only the cables left.

CIMG1812.jpg

CIMG1813.jpg

CIMG1814.jpg

Skrevet
  • Forfatter

Yesterday was a big day for me. After disassembling two cars, and over a year of waiting and work to get to this point, it was a really good feeling to finally start the assembly! :D Mounting the first part in that freshly painted chassis was something special..!;)

But first I had to empty the M3. Wiring harness is almost out.

CIMG1841.jpg

Finally got all the wires out, what a mess...****..

CIMG1842.jpg

Got everything sorted and now it looked a little better, wire heaven..

CIMG1843.jpg

Only the body left on the M3.

CIMG1855.jpg

CIMG1856.jpg

CIMG1859.jpg

Skrevet
  • Forfatter

318 completely stripped..

CIMG1846.jpg

I wanted to use the M3 sunroof because it was in much better shape than what was on the 318, and it had the black inner roof. Like all the parts on the M3 the sunroof was also like new. After disassembling the M3 I have really seen what a good car I bought, all the parts are in top condition. I didn't know if it was going to fit, but after placing them side by side the only difference was the front panel and the glas. (318 to the left, M3 right)

CIMG1848.jpg

M3 sunroof in the sedan. This was not a easy job on your own....

CIMG1851.jpg

First part in the car!!!

CIMG1852.jpg

Wires on it's way into the car...hmm.. where to start..

CIMG1863.jpg

After a while,.. mounted!

CIMG1866.jpg

CIMG1881.jpg

Skrevet
  • Forfatter

Parts going into the trunk.

CIMG1882.jpg

Done.

CIMG1884.jpg

All parts are washed before getting mounted.

CIMG1877.jpg

Had to drill two holes to get the M3 brakes to fit. The holes are the other way around on the 318.

CIMG1878.jpg

CIMG1879.jpg

Hmmm.. what is this??

CIMG1871.jpg

It's the new wheels for the M3 ;) This way I can easily move it around the garage by myself.

CIMG1873.jpg

Skrevet
  • Forfatter

Got some work done today as well. Started with the carpets. The front M3 carpets did fit, but I need to order new carpets in the rear.

CIMG1885.jpg

Got the heater mounted.

CIMG1896.jpg

Steel frame for the dash.

CIMG1900.jpg

Steering column mounted. After driving the E90 where you can adjust the steering further down/lower than in the E46, I used some time to see if there was a possibility to add some spacers on the steering column. This is possible and will not cause any problems. I will probably add that later to get a better driving position.

CIMG1903.jpg

Then the dash, finally!

CIMG1906.jpg

Now its starting to look like a car again...:D

CIMG1913.jpg

Skrevet
  • Forfatter

Since the top of the car came out so nice I had to do something with the underside. So I have been using a couple of days to get it up to a acceptable level. Here is the result...:D

DSC_0352.jpg

DSC_0350.jpg

DSC_0345.jpg

Had to try on the wheels one more time..

DSC_0359.jpg

Untitled-1.jpg

Got some interior parts today. Most of the interior is going to be new.

DSC_0372.jpg

DSC_0373.jpg

Skrevet
  • Forfatter

Got the fuel and brake lines under the car mounted. Took a lot of time cleaning the pipes but they came out looking like new. It almost feels like Im working on the factory assembling a new car, cause all the parts are like new and so is the car. Thats a good feeling. :D

DSC_0505.jpg

The undercoat is a special rust protection paint that leaves a thick and hard coat. It feels like powder coating. It's very nice ;)

DSC_0506.jpg

DSC_0508.jpg

Had to make some new mounting points for the lines here cause it was a slight difference from the coupe.

DSC_0514.jpg

Heat protection panels mounted.

DSC_0531.jpg

More brake lines...

DSC_0540.jpg

DSC_0554.jpg

Skrevet
  • Forfatter

Then it was the engine. Used balloons to keep water out of connectors and pipes..hehe..it worked really good!

DSC_0004.jpg

DSC_0005.jpg

So clean..:D

DSC_0008.jpg

DSC_0011.jpg

DSC_0013.jpg

Ready for the heart transplant.

DSC_0017.jpg

Skrevet
  • Forfatter

So today was the big day. Something I have been dreaming of for a long time, finally the engine was going to be mounted.

We mounted the front suspension to the engine first.

DSC_0003.jpg

On its way..

DSC_0009.jpg

DSC_0010.jpg

DSC_0013.jpg

Finally in!! At this point we celebrated with a couple of beers..:woot:

DSC_0023.jpg

Got all the connectors sorted.

DSC_0027.jpg

DSC_0028.jpg

This is how far I got today. Its been a great day and things have gone smooth.

DSC_0042.jpg

Skrevet
  • Forfatter

Im waiting for some parts before I can complete the front. So I have been working on other parts of the car.

Washing the rear suspension.

DSC_0001.jpg

DSC_0006.jpg

And a lot of other parts...

DSC_0013.jpg

Untitled-1.jpg

More parts..

DSC_0008.jpg

Two layers of paint did wonders for the trunk.;)

DSC_0004.jpg

Skrevet
  • Forfatter

Front damper KW V3 with Turner camber plate.

DSC_0002.jpg

DSC_0006.jpg

Damper mounted.

DSC_0016.jpg

Untitled-1.jpg

Front brakes 6 pot 355mm.

DSC_0028.jpg

Test fitting brakes.

DSC_0031.jpg

DSC_0032.jpg

DSC_0034.jpg

DSC_0039.jpg

DSC_0040.jpg

Skrevet
  • Forfatter

Test fitting with wheel. The ET45 wheel does touch the damper and brake caliper, but a 12mm spacer is on the way. I hope a ET33 will clear. At this point I was really satisfied. The big red brakes goes really well with the blue and the CSL wheels, slicks, KW damper and the black wheel arch. It do look sick..

DSC_0051.jpg

DSC_0054.jpg

DSC_0055.jpg

DSC_0058.jpg

DSC_0061.jpg

I got the windows today, all the windows in the car will be new. Im delivering them for tinting tomorrow, 50% tint all around.;)

Skrevet
  • Forfatter

I clued the Turner reinforcement plates with special epoxy clue(stronger than welding). I will make a DIY on this later together with the foam reinforcement of the subframe.

DSC_0026.jpg

Before..

DSC_0031.jpg

After. Cleaned the hub before mounting the brakes.

DSC_0030.jpg

Brakes mounted on the left side.

DSC_0044.jpg

Changing the fan and ac belt. This was really easy without the front on. ;)

DSC_0046.jpg

Changing a leaking rubber sealing.

DSC_0048.jpg

DSC_0049.jpg

Opprett en konto eller logg inn for å kommentere

Hvem er aktive 0

  • Ingen innloggede medlemmer aktive

Account

Navigation

Søk

Søk

Configure browser push notifications

Chrome (Android)
  1. Tap the lock icon next to the address bar.
  2. Tap Permissions → Notifications.
  3. Adjust your preference.
Chrome (Desktop)
  1. Click the padlock icon in the address bar.
  2. Select Site settings.
  3. Find Notifications and adjust your preference.